
Looking to create engaging video tutorials, record thrilling mobile gameplay, or simply capture a memorable moment on your Android device? This step-by-step guide will provide you with everything you need to know about screen recording on Android. Master the art of capturing your mobile experiences with ease and precision. Whether you’re a seasoned content creator or just starting out, this comprehensive guide will equip you with the knowledge and tools to record your screen effectively. Learn about the built-in screen recording functionality of various Android versions, as well as explore effective third-party apps for capturing high-quality screen recordings.
This guide covers everything from the basic process of initiating a screen recording on Android to more advanced techniques like recording internal audio and customizing your recording settings. We will explore various methods for screen recording, ensuring compatibility across different Android devices and versions. By the end of this guide, you’ll be confident in your ability to capture your mobile experiences with clarity and share them seamlessly. Get ready to elevate your content creation and capture those precious mobile moments with crystal-clear screen recordings on your Android device.
Built-in Screen Recording Tools: Utilizing Native Features
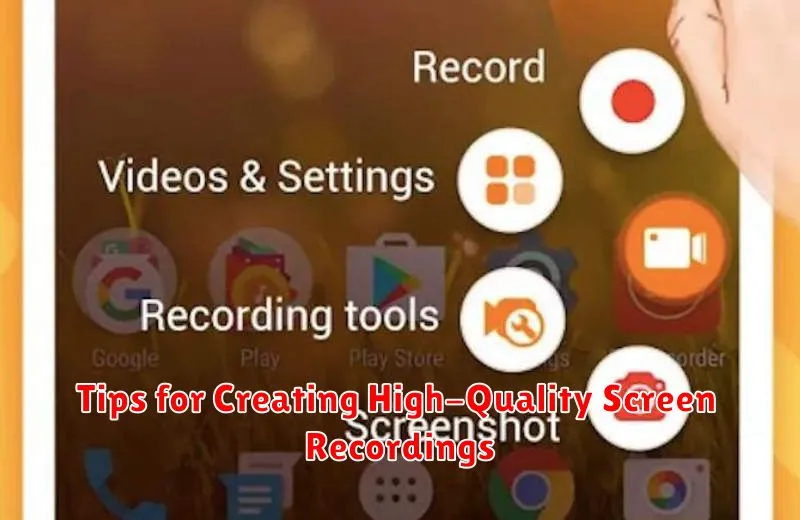
Many Android devices come equipped with native screen recording functionality, eliminating the need for third-party apps. Accessing these tools is generally straightforward, although the exact steps may vary slightly depending on your device’s manufacturer and Android version.
Typically, the screen recording feature can be found within the Quick Settings menu. Access this menu by swiping down from the top of your screen. Look for a screen record icon, often represented by a small camera with a dot inside. If you don’t see it immediately, you may need to expand the Quick Settings menu to reveal all available options. Some manufacturers may place the screen recorder within a submenu, labeled “Screen recorder” or similar.
Once you’ve located the screen record icon, tap it to initiate the recording. You may be presented with a short countdown before the recording begins. Be aware of any on-screen prompts requesting necessary permissions, such as access to audio or storage.
To stop the recording, simply pull down the notification shade and tap the “Stop” button on the screen recording notification.
Third-Party Screen Recording Apps: Expanding Your Options
While many Android devices offer built-in screen recording functionality, third-party apps often provide advanced features and greater flexibility. These apps cater to various needs, from simple screen capture to professional video editing capabilities.
Exploring third-party options can unlock features not found in native tools. Consider these potential advantages when choosing a third-party app:
- Higher resolutions and frame rates: Capture your screen activity in stunning detail.
- Internal/external audio recording: Choose between recording system sounds, microphone audio, or both simultaneously.
- Video editing tools: Trim, crop, and annotate your recordings directly within the app.
- Live streaming capabilities: Broadcast your screen in real-time to various platforms.
- Customizable overlays and watermarks: Personalize your recordings with branding elements or other information.
When selecting a third-party screen recorder, carefully evaluate user reviews and permissions. Some popular choices include AZ Screen Recorder, Mobizen Screen Recorder, and DU Recorder. Experiment with a few different apps to find the one that best suits your individual requirements and recording style.
Customizing Your Screen Recordings: Settings and Preferences
Most screen recording tools, both built-in and third-party apps, offer various customization options to tailor your recordings to your specific needs. Understanding these settings can significantly enhance the quality and usability of your captured content.
Video Resolution: Adjusting the resolution impacts the clarity of your recording. Higher resolutions (e.g., 1080p) result in sharper videos but consume more storage space. Lower resolutions (e.g., 720p or 480p) are suitable for smaller file sizes.
Frame Rate (FPS): This setting determines the smoothness of the video. Higher frame rates (e.g., 60fps) provide smoother motion, ideal for recording games or fast-paced actions. Standard frame rates (e.g., 30fps) are sufficient for general screen recordings.
Bit Rate: Bit rate affects the video quality and file size. A higher bit rate results in better quality but larger files, while a lower bit rate reduces file size but may compromise visual fidelity.
Audio Source: Choose whether to record internal audio (system sounds and app audio) or external audio (from the microphone). Some tools allow recording both simultaneously.
Troubleshooting Common Screen Recording Issues
Occasionally, you might encounter issues while attempting to record your Android screen. This section addresses common problems and provides potential solutions.
No Audio During Recording
If your screen recording lacks audio, ensure that the internal audio option is enabled in your screen recorder’s settings. Some apps might require specific permissions to capture internal audio. Check your device’s app permissions for the screen recorder.
Recording Stops Unexpectedly
Storage limitations can cause recordings to stop abruptly. Ensure sufficient free space on your device. Background processes or incoming calls might also interrupt recording. Try closing unnecessary apps before initiating a screen recording.
Poor Video Quality
Adjust the resolution and frame rate settings within your screen recorder to improve video quality. Lowering these settings can reduce file size and improve performance on less powerful devices.
Sharing and Managing Your Recorded Videos
After a successful screen recording, efficiently managing and sharing your videos is essential. Most screen recordings are automatically saved to your device’s photo gallery or a dedicated “Screen Recordings” folder. Locating these videos is typically straightforward via your default gallery app.
Sharing your recordings directly from the gallery app is often the quickest method. Select the video and tap the share icon. Choose your desired platform, such as email, messaging apps, or social media.
For more advanced management, consider using a file manager app. These apps provide tools to organize, rename, and move your recordings to different folders or cloud storage. Some file managers even offer basic video editing functionalities like trimming.
Remember to regularly review your recorded videos. Delete unwanted or outdated recordings to free up valuable storage space on your device.
Recording Internal Audio: Capturing System Sounds

Recording internal audio, which includes system sounds, game audio, and app sounds, can significantly enhance your screen recordings. However, capturing internal audio isn’t always straightforward due to operating system limitations and copyright restrictions. While some devices offer built-in internal audio recording, others may require third-party apps or specific hardware.
Native internal audio recording is often available in newer Android versions and on specific device models. Check your device’s screen recording settings or quick settings toggles for this option. If available, enabling it should directly capture internal audio alongside your screen recording.
If your device doesn’t natively support internal audio recording, you might consider using third-party screen recorder apps. Be sure to carefully research any apps before installing, looking at reviews and ensuring they are reputable and safe. Many apps offer internal audio recording as a feature, but effectiveness may vary depending on your device and Android version.
Tips for Creating High-Quality Screen Recordings
Plan Your Recording: A well-planned recording is crucial. Outline the steps you intend to demonstrate and practice the workflow before hitting record. This will minimize errors and create a more polished final product.
Stable Network Connection (For Online Activities): If your recording involves online activities, ensure a stable network connection to prevent lag or interruptions that could impact the recording’s quality.
Clean Up Your Screen: Close unnecessary apps and notifications to avoid distractions and keep the focus on the content you’re recording.
Adjust Volume Levels: Check both your microphone and system audio levels before starting. A balanced audio mix is essential for a professional-sounding recording.
Use External Microphone (Optional): For enhanced audio clarity, consider using an external microphone, especially if you’re narrating during the recording.
Test Recording: Before recording the final version, create a short test recording to verify audio and video quality. This allows you to make any necessary adjustments before committing to a longer recording session.
Exploring Advanced Recording Features
Beyond basic screen recording, many Android devices and apps offer advanced features to enhance your captures. These features allow for greater customization and control over the recording process, resulting in more polished and professional final products.
Recording Facecam Reactions
Some screen recorders offer the ability to simultaneously record your front-facing camera, overlaying a video of your reactions onto the screen capture. This is particularly useful for tutorials, game walkthroughs, or any recording where adding a personal touch is beneficial. Adjust the size and position of the facecam window to optimize the viewing experience.
Live Streaming
Certain apps extend screen recording functionality to live streaming platforms. This allows you to broadcast your screen activity in real-time, engaging with an audience directly. Streaming quality often depends on your internet connection and device capabilities, so consider these factors before initiating a live stream.
External Microphone Support
For enhanced audio quality, explore using an external microphone with your screen recording. This is especially useful for presentations or recordings where clear and crisp audio is paramount. Check compatibility between your device, recording app, and external microphone to ensure proper functionality.