
Connecting your iPhone to your Mac opens up a world of possibilities, seamlessly integrating your Apple devices. This comprehensive guide provides detailed instructions on how to connect your iPhone to your Mac using various methods, including USB, Wi-Fi, and Bluetooth. Whether you want to back up your iPhone, sync data, manage your files, or use Continuity features, this guide covers everything you need to know about establishing and maintaining a secure and reliable connection. Learn how to troubleshoot common connection problems and maximize the potential of your Apple ecosystem by effectively connecting your iPhone to your Mac.
From transferring photos and videos to accessing powerful features like Handoff, Sidecar, and AirDrop, discover the numerous benefits of connecting your devices. This guide will walk you through the process of connecting your iPhone to your Mac, step by step, explaining the different connection options and their advantages. Learn how to choose the best method for your needs and utilize the powerful tools and features that become available when your iPhone and Mac work together seamlessly. Begin harnessing the full power of your Apple devices by mastering the art of connecting your iPhone to your Mac.
Understanding the Connection Options: Cable vs. Wireless
Connecting your iPhone to your Mac offers flexibility through both wired and wireless methods. Choosing the right connection depends on your needs and the task at hand.
Wired connections, using a USB cable, provide a reliable and fast link, ideal for transferring large files, backing up your device, or performing iOS updates. This method ensures a stable connection and is essential for tasks requiring consistent data flow.
Wireless connections offer convenience and mobility. Features like AirDrop, iCloud Keychain, and Continuity Camera leverage your local network or iCloud to connect your devices seamlessly. This eliminates the need for cables and allows for quick sharing and syncing of information.
Consider the task you are performing when choosing your connection method. For large backups or software updates, a wired connection is recommended. For quickly sharing a photo or using your iPhone as a webcam, a wireless connection is more suitable.
Connecting iPhone to Mac via USB: A Step-by-Step Guide
Connecting your iPhone to your Mac using a USB cable is a reliable and efficient method for various tasks, including data transfer, charging, and backing up your device.
Step 1: Locate your iPhone’s charging cable (USB to Lightning). Ensure the cable is in good working order.
Step 2: Connect the Lightning end of the cable to your iPhone’s charging port.
Step 3: Connect the USB end of the cable to an available USB port on your Mac.
Step 4: If prompted on your iPhone, tap “Trust This Computer.” This establishes a trusted connection between your devices.
Step 5: Your iPhone should now appear in the Finder sidebar on your Mac. Select it to access various options like file transfer, syncing, and backing up.
Setting Up and Using iCloud Keychain: Syncing Your Data Seamlessly
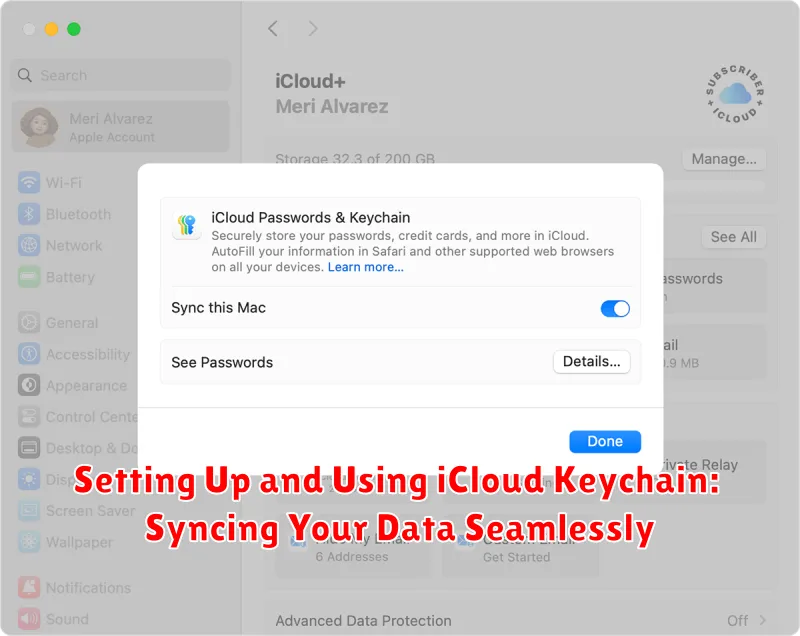
iCloud Keychain provides a secure and convenient way to sync your passwords, credit card information, and other sensitive data across all your Apple devices, including your iPhone and Mac. This eliminates the need to manually enter this information each time.
Enabling iCloud Keychain
To activate iCloud Keychain on your iPhone, navigate to Settings > [Your Name] > iCloud > Keychain and toggle it on. You’ll be prompted to set up a security code if you haven’t already. On your Mac, go to System Settings > [Your Name] > iCloud > Keychain and enable it. Ensure both devices are using the same Apple ID.
Using iCloud Keychain
Once enabled, iCloud Keychain will automatically save new passwords and prompt you to use saved credentials when logging into websites or apps. It also syncs credit card information for faster online purchases. You can manage your saved passwords and other data within the Keychain settings on both your iPhone and Mac.
Security Considerations
iCloud Keychain employs end-to-end encryption, meaning your data is only accessible to you. Apple cannot access this information. The security code you set during setup acts as an additional layer of protection.
Leveraging AirDrop for Quick File Transfers Between iPhone and Mac
AirDrop provides a fast and convenient way to wirelessly transfer files between your iPhone and Mac. It utilizes Bluetooth and Wi-Fi for a direct connection, eliminating the need for cables or third-party apps. This makes sharing photos, videos, documents, and other files incredibly efficient.
To use AirDrop, ensure both Wi-Fi and Bluetooth are enabled on both devices. Make sure your Mac and iPhone are discoverable by selecting “Everyone” or “Contacts Only” in AirDrop settings. On your iPhone, you can access these settings via Control Center.
Transferring files from your iPhone to your Mac: Open the file you wish to share. Tap the Share icon. Select your Mac from the list of available AirDrop devices.
Transferring files from your Mac to your iPhone: Locate the file you want to send. Right-click the file and select Share. Choose AirDrop. Then, select your iPhone from the available devices.
Troubleshooting AirDrop: If you encounter issues, double-check your AirDrop settings. Ensure both devices are within close proximity to each other and that neither device is in Airplane Mode. Restarting your devices can also resolve connectivity problems.
Exploring Advanced Connectivity Options with Continuity Camera
Continuity Camera elevates the integration between your iPhone and Mac, transforming your iPhone into a versatile webcam and scanner. This feature streamlines workflows, offering high-quality video and image capture directly within compatible macOS applications.
Wireless Continuity Camera allows seamless connection without plugging in your iPhone. Simply position your iPhone near your Mac, and it automatically appears as a camera option. This eliminates cable clutter and provides flexibility for positioning.
USB Continuity Camera offers a wired connection for enhanced stability, particularly useful for bandwidth-intensive tasks like video conferencing or live streaming. Connect your iPhone to your Mac using a USB cable to utilize this feature.
Continuity Camera offers two distinct modes: Camera and Scanner. Camera mode uses your iPhone’s rear camera to capture high-quality video and still images. Scanner mode utilizes the iPhone’s camera to create scans of documents, automatically adjusting perspective and cropping for optimized results.
Center Stage, available on supported iPhone models, automatically keeps you centered in the frame during video calls, even as you move around. Desk View uses the ultra-wide camera on your iPhone to show both your face and your desk, ideal for presentations or tutorials.
Troubleshooting Common iPhone-Mac Connection Issues
Connecting your iPhone to your Mac should be seamless, but occasionally issues arise. This section outlines common problems and their solutions.
Device Not Recognized
If your Mac doesn’t recognize your iPhone, try these steps:
- Check the cable: Ensure you’re using a genuine Apple cable and that it’s not damaged.
- Restart devices: Restart both your iPhone and Mac.
- Trust the computer: When connecting, unlock your iPhone and tap “Trust” if prompted.
- Update software: Make sure both your iPhone and Mac are running the latest software versions.
Slow Transfer Speeds
Experiencing slow transfer speeds? Consider these:
- Cable type: Using a USB 2.0 cable will result in slower speeds than a USB 3.0 or USB-C cable.
- Background processes: Close any unnecessary applications on both devices.
Other Issues
If you encounter other issues, try different USB ports on your Mac. If the problem persists, contact Apple Support.
Best Practices for Optimizing Your iPhone-Mac Workflow
Streamlining your workflow between your iPhone and Mac can significantly boost productivity. Here are some best practices to consider:
Leveraging Continuity Features
Handoff allows seamless transitioning between devices. Start a task on your iPhone and pick it up right where you left off on your Mac, and vice versa. Ensure Handoff is enabled in settings on both devices.
Universal Clipboard lets you copy text, images, and other content on one device and paste it on the other. This eliminates the need for cumbersome workarounds.
AirDrop enables quick and easy file sharing between your iPhone and Mac wirelessly. Ensure both devices have Wi-Fi and Bluetooth enabled.
Staying Organized
iCloud Keychain stores and syncs your passwords securely across all your Apple devices. This ensures you always have access to your login credentials.
iCloud Drive provides a central storage location accessible from both your iPhone and Mac. Keeping important files in iCloud Drive streamlines access and ensures they’re always up-to-date.