
Is your phone’s camera acting up? Are you experiencing blurry photos, unexpected crashes, or other frustrating camera issues? This comprehensive guide offers practical troubleshooting steps and solutions to help you diagnose and fix a variety of common phone camera problems. Whether you’re dealing with a hardware issue, a software glitch, or simply need to adjust your camera settings, this guide will empower you to get your camera back in perfect working order.
From focus problems and poor image quality to camera app errors and hardware malfunctions, we cover a wide range of potential camera problems and offer effective troubleshooting techniques. This guide addresses issues across different phone models and operating systems, providing clear instructions and helpful tips to get your phone’s camera working optimally again. Learn how to identify the root cause of your camera issue and resolve it efficiently, so you can capture those important moments without frustration.
Identifying the Problem: Is It Hardware or Software?
Before diving into solutions, it’s crucial to determine if your camera issue stems from a software glitch or a hardware malfunction. This will help you narrow down the troubleshooting steps and potentially save you time and effort.
Software problems are often indicated by erratic behavior within the camera app itself. This might include the app freezing, crashing, producing distorted images, or displaying error messages. Issues with other apps affecting the camera’s functionality (like permissions problems) also fall under this category.
Hardware problems, on the other hand, are usually more consistent and may involve physical damage. A cracked lens, malfunctioning flash, or issues with the camera’s connection to the phone’s internal circuitry are all examples of hardware issues. These might manifest as a completely unresponsive camera, blurry images regardless of app settings, or a black screen in the camera viewfinder.
Pinpointing the source of the problem involves a process of elimination, starting with the easier software fixes and moving towards hardware troubleshooting if necessary. The following sections will guide you through both.
Common Camera Problems and Their Solutions
This section outlines frequent camera issues and their potential fixes. If your camera is exhibiting unusual behavior, consult the troubleshooting steps below.
Blurry Images
Cause: Often due to a dirty lens, shaky hands, or incorrect focus. Solution: Gently clean the lens with a microfiber cloth. Ensure your hands are steady or utilize a tripod. Tap the screen to refocus on your subject.
Unexpectedly Dark Photos
Cause: Low light conditions or incorrect exposure settings. Solution: Increase the exposure within the camera app if available. Consider using the flash in dim environments. Make sure your finger isn’t covering the lens or flash.
Camera App Crashes
Cause: Software glitches or conflicts with other apps. Solution: Force close the camera app and try reopening it. If the issue persists, clear the camera app’s cache and data.
“Can’t Connect to Camera” Error
Cause: A software or hardware problem preventing the app from accessing the camera. Solution: Restart your device. If the problem continues, it might indicate a more serious issue requiring professional assistance.
Checking for App Conflicts and Permissions
Sometimes, conflicts between apps can interfere with your camera’s functionality. This is especially true with third-party camera apps or apps that utilize the camera, like social media platforms. If you suspect an app conflict, try the following:
Identifying App Conflicts
Think about any recently installed apps, especially those that use the camera. Try temporarily disabling these apps one by one to see if the camera issue resolves. To disable an app, navigate to your phone’s settings, usually under “Apps” or “Applications.” Find the suspected app and select “Disable.”
Checking and Managing Permissions
Ensure your camera app has the necessary permissions to function correctly. In your phone’s settings, go to “Apps” or “Applications,” then find your camera app. Select “Permissions.” Verify the camera app has permission to access the camera and microphone, and possibly storage if you’re saving photos and videos.
Restarting Your Device and Clearing Cache
Sometimes, the simplest solutions are the most effective. Restarting your phone can resolve temporary software glitches that may be affecting your camera. This simple action refreshes the system and often clears minor errors.
To restart your device, follow these steps:
- Press and hold the power button on your phone.
- Select the “Restart” option.
- Allow your phone to completely power down and restart.
Clearing the camera app’s cache can also improve its performance. The cache stores temporary files, and if these files become corrupted, they can interfere with the camera’s functionality. Clearing the cache removes these files without deleting your photos or videos.
To clear the camera app’s cache:
- Navigate to your phone’s settings.
- Find the “Apps” or “Application Manager” section.
- Locate and select the “Camera” app.
- Tap on “Storage” or “Storage & cache.”
- Select “Clear Cache.”
Important: The exact steps may vary slightly depending on your phone’s manufacturer and Android version. Consult your phone’s user manual or online support resources for specific instructions if needed.
Troubleshooting Camera Hardware Issues
While many camera issues stem from software glitches, sometimes the problem lies with the hardware itself. Troubleshooting hardware issues can be more complex and often requires professional repair. However, there are a few things you can check yourself.
First, inspect the camera lens for any visible damage like scratches or cracks. Even small imperfections can significantly impact image quality. Ensure the lens is clean and free of debris. Gently wipe it with a soft, microfiber cloth.
Next, check for any physical obstructions. Make sure a case or screen protector isn’t blocking the lens or flash. If your phone has a moving camera mechanism, like a pop-up lens, ensure it’s deploying correctly and isn’t obstructed.
If you’ve recently dropped your phone, internal components related to the camera might have been damaged. This often requires professional assessment. If your phone is under warranty, contact the manufacturer or retailer for repair or replacement options. If not, consider seeking a reputable phone repair specialist.
Factory Reset as a Last Resort
A factory reset should be considered a last resort when troubleshooting camera issues. This process will erase all data on your phone, returning it to its original factory settings. Ensure you have backed up all important data before proceeding.
While a factory reset can resolve software-related camera problems, it’s not a guaranteed fix for hardware issues. If the camera still malfunctions after a reset, it likely indicates a hardware problem requiring professional repair.
Performing a Factory Reset
The steps to perform a factory reset vary depending on your phone’s make and model. Generally, you can find this option within the “Settings” menu, often under “System” or “Backup & reset.” Consult your phone’s user manual or manufacturer’s website for specific instructions.
Caution: After the reset, your phone will be like new. You will need to restore your data from a backup.
Tips for Preventing Future Camera Problems
Protecting your phone’s camera can prevent many common issues. A few simple precautions can significantly extend its lifespan and maintain its performance.
Physical Protection
Cases: Use a protective case that covers the camera lens area. This helps prevent scratches and damage from drops and bumps. Ensure the case is compatible with your phone model and doesn’t obstruct the lens.
Lens Cleaners: Use a soft, microfiber cloth specifically designed for cleaning lenses. Avoid using abrasive materials or harsh chemicals. Gently wipe the lens to remove smudges or fingerprints.
Storage: Avoid placing your phone in pockets or bags with abrasive items like keys or coins, which can scratch the lens.
Software Maintenance
Updates: Keep your phone’s operating system and camera app updated. These updates often include bug fixes and performance improvements, which can address camera-related issues.
Storage Management: Ensure sufficient storage space on your device. A full storage can sometimes interfere with camera functionality. Regularly delete unnecessary files or move them to cloud storage.
When to Seek Professional Repair
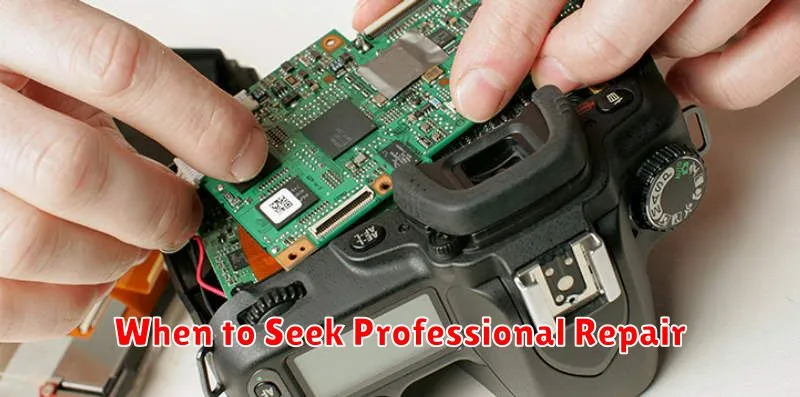
While many camera issues can be resolved through troubleshooting steps, some problems necessitate professional intervention. If you’ve exhausted all other options, consider seeking professional repair in the following scenarios:
Physical Damage: If your phone has been dropped or subjected to impact, resulting in visible damage to the lens or camera module, professional repair is essential. Attempting DIY repairs on hardware components can exacerbate the issue.
Water Damage: Liquid damage can corrode internal components, including the camera’s circuitry. Professional repair is required to assess the extent of the damage and potentially replace affected parts.
Persistent Issues After Software Troubleshooting: If you’ve tried restarting your device, updating the software, and clearing the camera app’s cache and data, yet the problem persists, it may indicate a hardware malfunction requiring professional attention.
Unusual Error Messages: If you encounter persistent error messages related to the camera that are not resolved through basic troubleshooting, consult a professional. These messages often indicate underlying hardware or software problems beyond the scope of user fixes.