
Are you tired of the limitations of your phone’s stock operating system? Do you crave a more personalized and powerful mobile experience? Unlock the true potential of your device by installing a custom ROM. This comprehensive guide will provide a step-by-step approach to navigating the process of installing a custom ROM, transforming your phone into a truly customized powerhouse. Learn how to overcome the restrictions of pre-installed software and gain access to a world of enhanced features, improved performance, and greater control over your device’s functionality. Whether you’re seeking improved battery life, enhanced privacy, or the latest Android updates, this guide will equip you with the knowledge and tools to install a custom ROM successfully.
This step-by-step guide will demystify the process of installing a custom ROM, providing clear and concise instructions for every stage. From backing up your data and unlocking your bootloader to installing a custom recovery and finally flashing the custom ROM, we’ll cover every crucial detail. Explore the benefits of installing a custom ROM, including access to customized user interfaces, root access for advanced control, and the ability to remove bloatware. Discover how to tailor your phone’s performance and appearance to perfectly match your individual preferences. Embark on your journey to unleash your phone’s potential and join a community of passionate users who have already experienced the transformative power of custom ROMs.
Understanding the Risks and Benefits of Custom ROMs
Before diving into the process of installing a custom ROM, it’s crucial to understand the potential risks and rewards involved. A custom ROM replaces your phone’s operating system with a community-developed alternative.
Benefits:
- Enhanced Features and Customization: Custom ROMs often offer features not found in stock Android, allowing for greater personalization.
- Improved Performance: Some ROMs are optimized for speed and efficiency, potentially leading to a smoother user experience.
- Updated Software: Custom ROMs can provide access to newer Android versions even if your device manufacturer no longer supports updates.
- Bloatware Removal: Many custom ROMs eliminate pre-installed applications, freeing up valuable storage space.
Risks:
- Bricking Your Device: An improperly installed ROM can render your phone unusable. Caution is paramount.
- Voiding Your Warranty: Installing a custom ROM might void your manufacturer’s warranty.
- Security Vulnerabilities: Some custom ROMs might have security flaws that could compromise your data. Choose reputable ROMs from trusted developers.
- Loss of Data: While backups are recommended, there’s always a risk of data loss during the installation process.
Choosing the Right Custom ROM for Your Device
Selecting the right custom ROM is a critical step. Compatibility is paramount. Ensure the ROM is explicitly built for your specific phone model. Using an incompatible ROM can lead to a bricked device.
Research different ROMs available for your device. Popular options often include LineageOS, Pixel Experience, and Paranoid Android. Each offers unique features and customization options.
Consider your priorities. Are you looking for a pure Android experience, enhanced performance, or extended battery life? Read reviews and forum discussions to understand the strengths and weaknesses of each ROM.
Pay attention to the ROM’s development status. A stable build is generally recommended for everyday use. Nightly builds offer the latest features but may contain bugs. Read changelogs and user feedback before making a decision.
Unlocking Your Phone’s Bootloader
Unlocking your bootloader is a crucial step before installing a custom ROM. It essentially removes the manufacturer’s restrictions, granting you access to modify the core software of your device. However, this process usually voids your warranty, so proceed with caution.
The unlocking process varies significantly depending on the phone’s manufacturer and model. Some manufacturers provide official unlocking tools, while others require more complex methods. Generally, the steps involve enabling developer options and USB debugging on your phone, then using a computer and specific software to interact with the bootloader.
Important Considerations:
- Research the specific unlocking instructions for your device model carefully.
- Ensure your phone is fully charged before starting the process.
- Understand that unlocking the bootloader will typically wipe all data on your device, so back up important files beforehand.
Once the bootloader is unlocked, your phone is ready for the next stage: installing a custom recovery.
Installing a Custom Recovery (TWRP/CWM)
A custom recovery is essential for installing custom ROMs. It replaces your stock recovery with a more powerful one, offering advanced features like flashing ZIP files and creating backups.
Two popular custom recoveries are Team Win Recovery Project (TWRP) and ClockworkMod Recovery (CWM). The specific installation process varies depending on your phone model. Consult your device’s specific forum or XDA Developers thread for detailed instructions. However, the general steps usually involve:
- Downloading the appropriate recovery image: Ensure you download the correct version for your specific device model.
- Connecting your phone to your computer: You’ll typically use a USB cable and may need to enable USB debugging in your phone’s developer options.
- Using fastboot commands: Fastboot is a tool used to modify your phone’s system partition. The command to flash the recovery will often look something like
fastboot flash recovery recovery.img(replace “recovery.img” with the actual file name). - Rebooting into recovery: Once flashed, you’ll need to boot your device into the newly installed custom recovery. This is usually done by holding a specific combination of buttons during startup (e.g., Volume Up + Power).
Caution: Incorrectly flashing a recovery can potentially brick your device. Carefully follow the instructions for your specific phone model.
Backing Up Your Current ROM and Data
Before proceeding with any ROM installation, creating a comprehensive backup is paramount. This precaution ensures you can revert to your current setup should anything go wrong during the custom ROM installation process. Losing data during this process is a real possibility, making a backup essential.
There are several methods to back up your device. Most custom recoveries (TWRP/CWM) offer built-in backup functionalities. These tools allow you to create a full image of your current system, including apps, data, and settings. This is the recommended method as it provides the most complete backup.
Alternatively, you can back up specific data like contacts, photos, and messages using built-in phone features or third-party apps. While this approach is less comprehensive, it ensures you retain crucial personal information. Remember to store your backup in a safe location, such as a computer or external storage, not on your phone’s internal storage.
Downloading the Custom ROM and GApps
Choosing the right Custom ROM and GApps (Google Apps) package is crucial for a successful installation. Compatibility is key. Ensure the ROM and GApps are designed for your specific phone model and Android version. Downloading incompatible files can lead to bootloops or a bricked device.
Research different ROMs to find one that suits your needs. XDA Developers is a valuable resource for finding ROMs and user reviews. Once you’ve chosen a ROM, download the latest stable version to your computer. Similarly, select a GApps package appropriate for the Android version of the ROM.
Always download these files from reputable sources. Official developer websites and recognized forums are the safest options. Downloading from untrusted sources can expose your device to malware.
After downloading, transfer both the ROM and GApps files to your phone’s internal storage or SD card, depending on your recovery mode’s preference. Make sure the files are easily accessible from your recovery environment.
Wiping Data and Cache
This crucial step prepares your device for the custom ROM by removing existing data and clearing the cache. Failure to wipe data can result in installation errors or bootloops. Ensure you have backed up all important data before proceeding, as this process will erase everything on your internal storage.
Boot your phone into recovery mode. The method for accessing recovery mode varies depending on your device, but commonly involves holding a combination of buttons while powering on. Consult your device’s specific instructions.
Once in recovery mode, navigate using the volume buttons and select options with the power button. Locate and select the “Wipe data/factory reset” option. Confirm your selection.
Next, find and select “Wipe cache partition.” This clears the system cache, further ensuring a clean installation.
Some custom ROMs or recovery environments may offer additional wiping options, such as “Wipe Dalvik/ART Cache.” If available, wiping this is also recommended. Consult the specific instructions for your chosen ROM.
After the wiping process is complete, you’re ready to flash the custom ROM.
Flashing the Custom ROM and GApps
With the necessary files downloaded and your device prepared, you’re ready to flash the custom ROM. Reboot your phone into recovery mode. The method varies between devices, but commonly involves holding a combination of power and volume buttons.
Once in recovery, locate the “Install” or “Apply update” option. Navigate using the volume buttons and select with the power button. Choose the custom ROM ZIP file you downloaded earlier. Confirm your selection to begin the flashing process.
After the ROM installation completes, repeat the process for the GApps package (if desired). It is crucial to flash GApps immediately after the ROM, without rebooting the system in between.
Finally, select the “Wipe cache/dalvik” option within the recovery menu to clear any residual data. This step is essential for a clean installation and prevents potential conflicts. Once complete, reboot your phone by selecting “Reboot system now”.
Troubleshooting Common Installation Issues
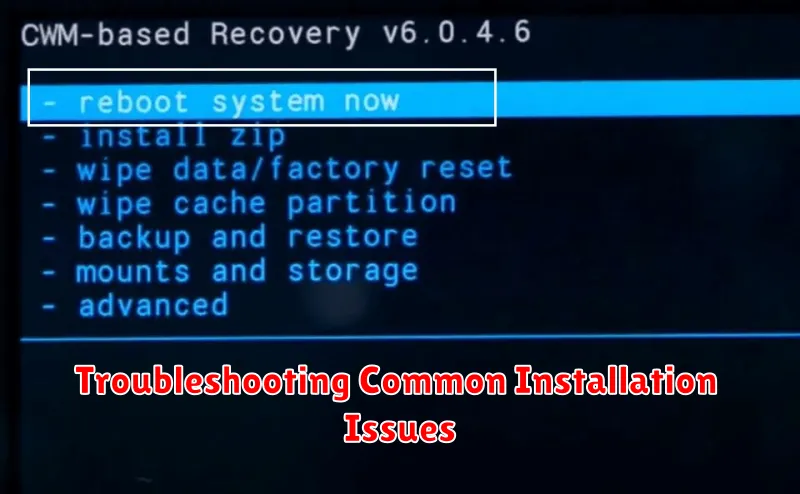
Encountering problems during a custom ROM installation is not uncommon. This section outlines some frequent issues and their potential solutions.
Bootloop
If your phone is stuck in a continuous boot cycle (bootloop), try rebooting into recovery and wiping the cache and dalvik cache again. If the problem persists, reflash the ROM and GApps, ensuring you downloaded the correct files for your device model. A factory reset might be necessary as a last resort.
Status 7 Error
This error usually indicates an incompatibility between the ROM and your device. Double-check that the ROM is specifically designed for your phone’s model number. Attempting to install an incompatible ROM can brick your device.
Storage Issues
If you encounter errors related to insufficient storage, ensure you have enough free space on your internal storage. Clearing app data and cache from your previous ROM can often free up enough space.
Restoring Your Previous ROM (If Needed)
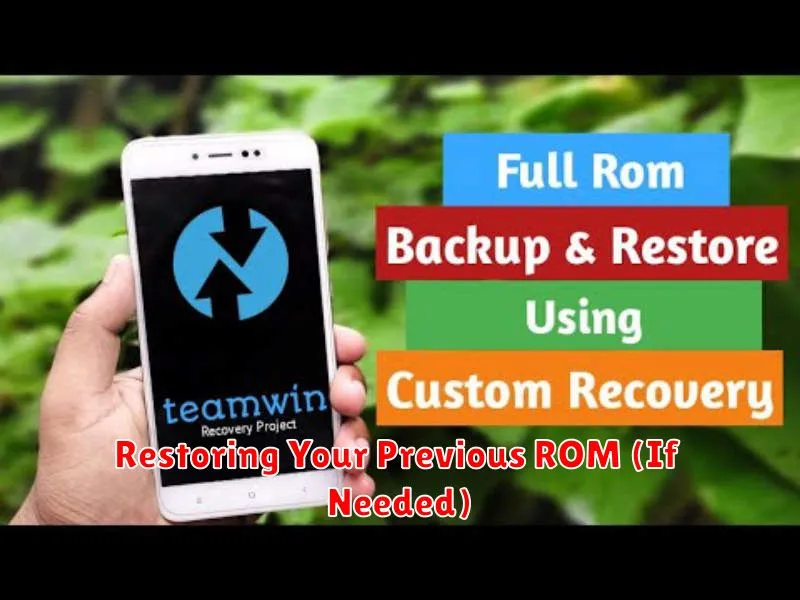
Sometimes, the custom ROM experience might not be what you expected, or you may encounter unforeseen issues. In such cases, reverting to your previous ROM is a viable option. This process generally involves restoring a backup created before installing the custom ROM. Ensure you have a backup before proceeding with a custom ROM installation.
Restoring from a Nandroid Backup:
- Boot into your custom recovery (the same one used to install the custom ROM).
- Locate the “Restore” or “Backup and Restore” option.
- Select the backup you created before installing the custom ROM.
- Confirm the restore process and wait for it to complete.
- Reboot your device.
Restoring from a Factory Image: If you didn’t create a Nandroid backup, restoring a factory image provided by your device’s manufacturer is another option. This process varies depending on the device manufacturer. Consult your device’s specific instructions on how to restore a factory image. This will erase all data on your device.